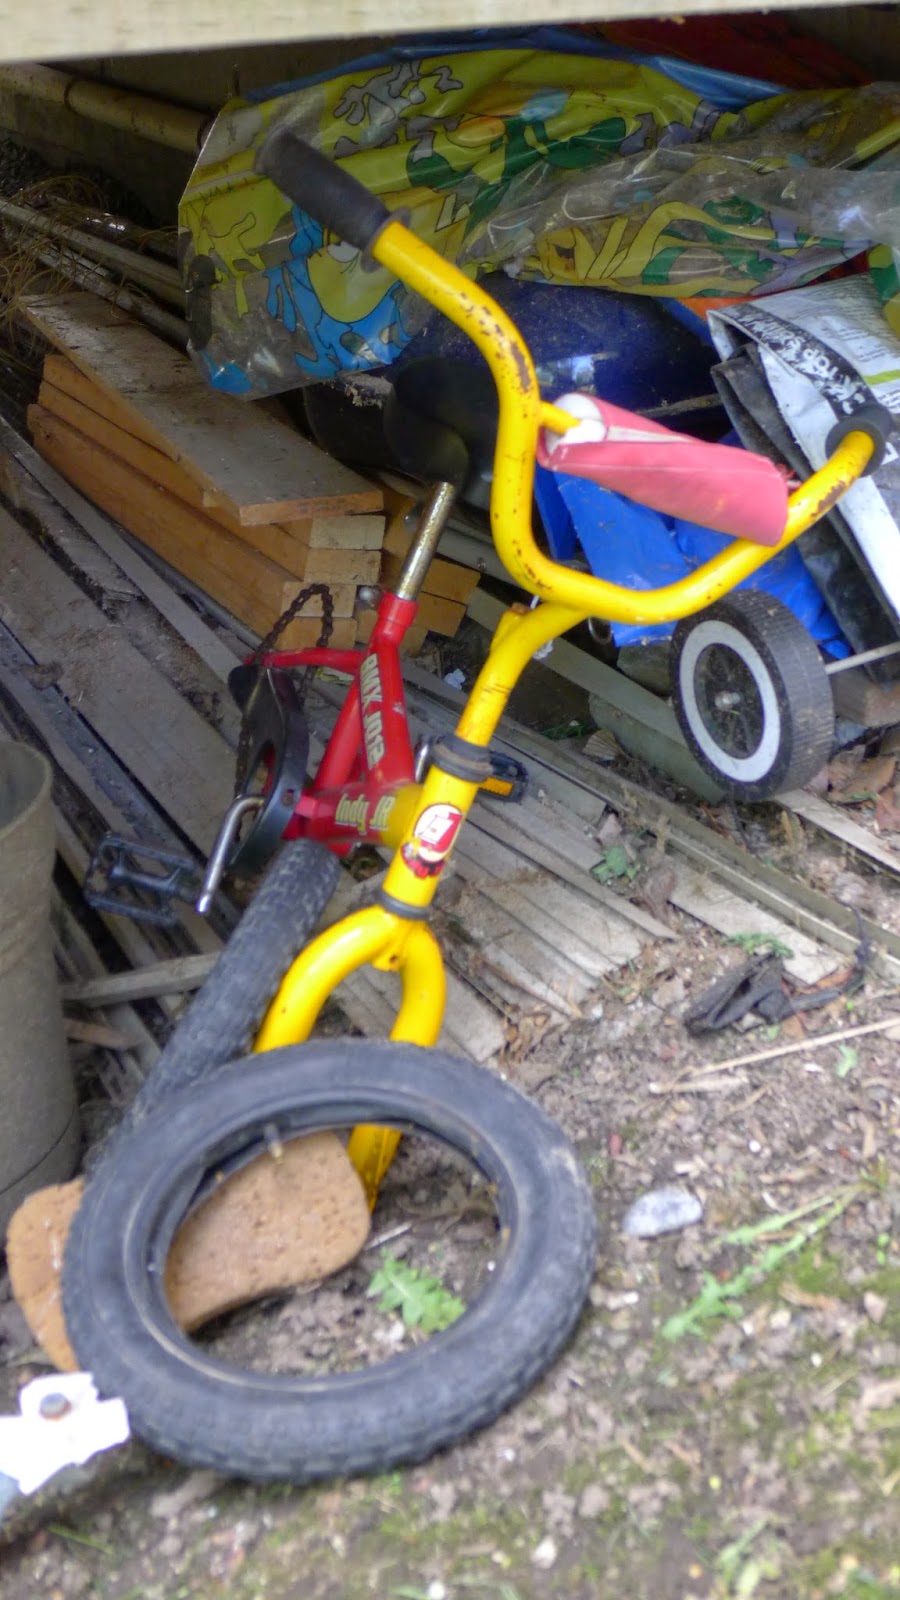
Anyone with kids under about six years old knows what a balance bike is. I wanted one for my then eighteen month old, but could not afford it. I am also not a fan of plywood which is what all of the wooden balance bikes out there are made of, so I decided to try my hand at making one. I tried a number of designs on paper but was not exactly sure what I was trying to make. I wanted some twelve inch wheels and wanted them to be regular bike wheels. I found a beat up red and yellow kids bike for free.

I wanted the wheels but this was a pedal bike and the rear rim had a coaster brake and chain sprocket. I needed the rim to be missing these components. I was able to find an additional rim with the same hub and so I modified the original hub removing the parts that I didn't want.
Painting the hubs, spokes and rims was more difficult than I had anticipated and I ended up having to wire brush the rims and use epoxy paint and primer to get them black. I polished the spoke nipples with a homemade polishing wheel on my drill press. The axle that I used for the rear hub had very beat up nuts. I had to search through the parts bins at a couple of different bike shops before finding some slightly mismatched nuts. The front hub was a different story and I ended up modifying the front axle shaft so that I could use knock down furniture nuts to eliminate the axle hubs sticking out on the front forks.
Making the frame was by far the most difficult part of this build, specifically trying to make the seat adjustable, the rear forks removable and the bike build possible. While I was building the body of the bike, my father, who was visiting at the time, bought a small belt/spindle sander for me. This made the build a lot easier. I ended up making it harder for myself than it needed to be but it did work out in the end. Most wooden balance bikes have a steering limiter that I presume is for safety. I made the opposite assumption that my son should be able to handle the full unlimited steering and if there is a fall or two it will just make him better with the bike. It seems that I was right as he is very good with the bike although he really didn't start using it much until he was two and a half.
I like to pick wood scraps out of a local exotic wood suppliers burn bin. This bike was built using wood that I had sitting around. I learned after making the bike that walnut is a good wood for bending. The photocopier parts in this bike include sealed bearings from the copier in the front wheel as well as the headset which is made from a duplexer shaft, snap rings and more sealed bearings. The headset is removable if the bearings need to be replaced. The seatpost is notched so that the seat can be raised and lowered as needed. The mechanism for seat adjustment is a couple of snap rings and a bolt with a long cross dowel attached. I realized after I had drilled the hole for the seat post that bikes have the front forks and the seatposts at the same or a very similar angle. This was a major mistake that I made as the angle of the seat post is not the same as the forks. I have yet to see how much this will affect my son as he grows taller.

When I was finished the bike I was not sure how to finish it so that it would be resistant to water and weather and not use varnish or other traditional finishes. I am partial to oil finishes as they are more child-friendly. In this case I was not sure that tung oil was going to do it. I work quite often with three part epoxy. I concluded that if I was to mix epoxy without the texturizer in it, brush it on and then rub it off like with an oil finish, it would be tough enough. The difference would be that the epoxy finish would be permanent and not need to be maintained like an oil finish and ultimately be completely waterproof.

I did not take many pictures during the build so I have taken some pics of the bike in it's current finished state.
Created June 2013


 It was my wife's birthday. She is quite a practical person and had been wanting a patio table for quite a long time. I had been resisting but she found a deal that was too good to pass up. A large teak table and benches. As you can see the table was in pretty rough shape. Joints coming unglued and the teak had been left to dry in the sun and was quite parched. Begin the next project... So after complete tear down and rebuild, the table has been transformed into a very nice set again. The set originally had 4 benches but I had to use one bench for parts. The bench that was sacrificed was already broken and most of the wood was so dry that it was beyond being revived. I used stainless steel hardware after finding that the last person had put the table together with drywall screws. I used marine epoxy to reglue and teak oil on the finish and it seems to be very water resistant.


 I have been working on an project that will stay unmentioned at this time and needed a large compass for it. I began looking for plans for a compass and came across this very nice Beam Compass. I built it slightly differently from the plans using some photocopier parts and other things laying around. The thumb screw is the copier part here. The brass point is a piece of brass I had sitting around. I have found that using a dremel or grinder on a piece that is spinning in the drill press allows or some easy creation of symetrical patterns that would only otherwise be possible on a metal lathe.
 This last Christmas saw me once again enter uncharted waters. I am not really one for repetition and so do not usually repeat projects. For Christmas, my wife wanted to get a small keyboard for my son. I am not much for electronics for kids and so suggested maybe a xylophone or... then I had the idea that would spawn yet another period of scratching my head in frustration. Little did I know at the time but this project would ruin many of my clothes and stain everything! I decided to make a marimba. I found the dimensions for keys and tuning info on a website from another DIY guy. Enter the plans and how to design this thing. I wanted it to be transportable but did not like the design of most of the portable marimbas that I could find.


 The seat back was laminated up from pieces of walnut that were steam bent. This was a poorly laminated piece because I have limited knowledge of steam bending principles. The seat back turned out pretty good in the end though. I used epoxy for gluing and tung oil for a finish because it is an edible oil and I figured that my son would chew on it at some point.

 I have found over time that on occasion I do not have the specific tool that I need for something. Usually this is a result of not having the money to buy specialized tools, but sometimes this means that the specific item that I need does not exist or at least not in the format that I need. I suppose that I will admit that it may also be because I am not aware of every tool there is out there. One day, I needed a drill press but didn't have the money and had some holes that needed to be drilled that I knew a drill press was not ideal for. So the construction of my first homemade tool began. It is not an ideal tool by any means but the part that is lacking is simply the ability to hold the drill securely. Made entirely out of photocopier parts, this will either amaze you or confirm the suspicion that I am a little crazy. If you take a look at the high chair post you will see that it did a good enough job on that project. There is an attachment for the base that allows me to clamp a board on and drill into the end grain.